Author: gl

  • Simple Ways to Make Your Large Room Feel Cozy

    Simple Ways to Make Your Large Room Feel Cozy

    Simple Ways to Make Your Large Room Feel Cozy

    If you’re wondering how to make a large room feel cozy, you’re not alone. Living in a home with an open floor plan or soaring ceilings often seems like the dream. We imagine airy, expansive spaces perfect for hosting gatherings and enjoying a sense of freedom. But once you’re living in it, that grand room can feel less like a dream and more like a cavernous, cold hall. Sound bounces off the walls, furniture seems to float aimlessly, and it’s hard to feel snug in a space that feels more like a lobby than a living room.

    The great news is that you don’t need to build new walls to solve this. With a few strategic design choices, you can transform your big room into an inviting sanctuary. Discover practical and effective ways to make a large room feel cozy, warm, and inviting.

    Divide and Conquer with Zones

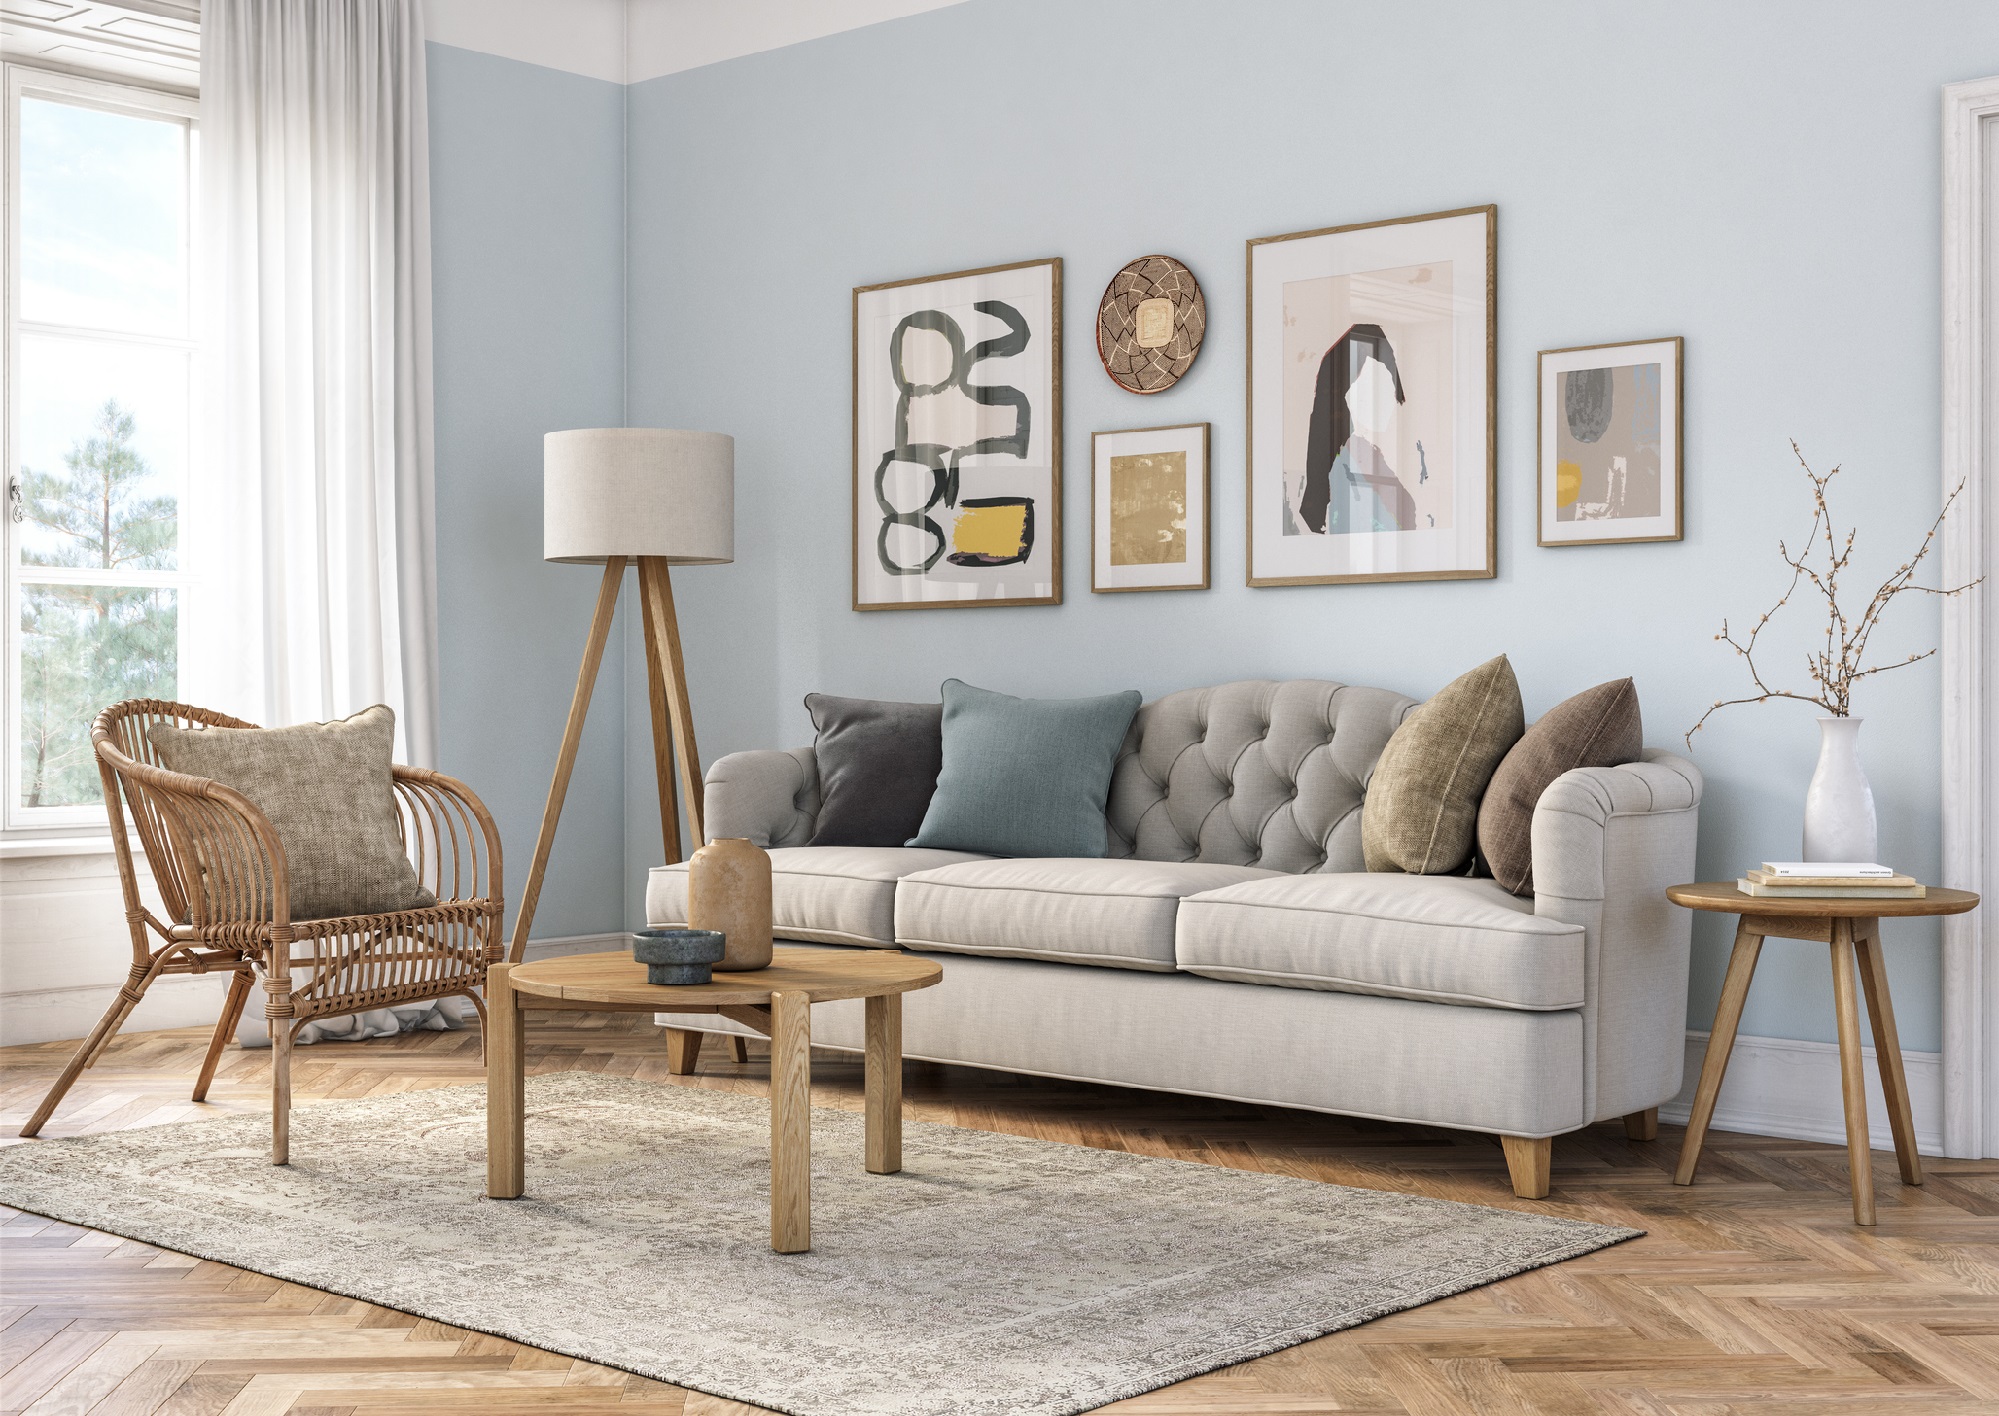
    One of the best strategies for how to make a large room feel cozy is breaking the space into intentional zones. The single biggest mistake in a large room is pushing all the furniture against the walls. This creates a vast, awkward void in the center and makes the space feel disconnected. The solution is to think of your large room as a collection of smaller, functional spaces or “zones.”

    Float Your Furniture to Create a Core

    Floating your seating area is one of the simplest ways to make a large room feel cozy without adding clutter. Start by creating a primary seating area. Pull your sofa and chairs away from the walls and group them closer together. The goal is to arrange the seating so people can have a conversation without raising their voices. A coffee table should be within easy reach of every seat, anchoring the arrangement. This creates a focused center of gravity for the room.

    Designate Secondary Activity Areas

    Once your main conversation hub is set, look at the remaining space and give it a job. By creating different destinations within the larger landscape, you eliminate that “dead space” feeling.

    • Create a Reading Nook: An empty corner is the perfect spot for a solitary retreat. Add a comfortable armchair, a small side table, and a dedicated floor lamp. This turns an overlooked area into a purposeful destination.
    • Establish an Entertainment Zone: If your room is long, you might dedicate one end to watching TV. A console table or a low bookshelf placed behind the sofa can act as a subtle divider, visually separating this zone without blocking sightlines.
    • Add a Game or Work Space: A small round table with a couple of chairs can become a spot for board games or puzzles. You could also place a desk behind your sofa to carve out a home office that feels connected yet distinct.

    Anchor Your Zones with Area Rugs

    If furniture creates the zones, area rugs are what define them. On hard surfaces like wood or tile, furniture can feel like it’s drifting in an ocean of empty floor. Rugs are essential when learning how to make a large room feel cozy because they visually anchor your space.

    Size Is Everything

    When choosing a rug for a large room, think big. A small rug will look like a postage stamp and only emphasize how much empty floor is left. As a rule of thumb, your area rug should be large enough for at least the front legs of all your main furniture pieces to rest on it. This creates a unified and intentional island of comfort.

    Layer for Extra Warmth and Depth

    For an extra dose of coziness, try layering your rugs. Start with a large, neutral base rug made of a natural fiber like jute or sisal. This can cover a significant portion of the floor. Then, place a smaller, softer, and more patterned rug on top, such as a vintage wool or faux fur rug. This adds physical warmth underfoot and a visual depth that makes the space feel more curated and lived-in.

    Lower the Ceiling with Smart Lighting

    High ceilings are a beautiful architectural feature, but they can make a room feel impersonal. Smart lighting plays a major role in how to make a large room feel cozy by lowering the perceived height of the room.

    Forget the “Big Light”

    Relying only on a single overhead fixture or recessed ceiling lights is a fast track to a sterile, cold environment. This top-down lighting casts harsh shadows and emphasizes the vast, empty space above your head.

    Create Pools of Warm Light

    Instead, focus on creating a lower “horizon” of light at eye level. Use a combination of floor lamps and table lamps to create focused pools of warm light where you live and relax. This draws your attention to the inhabited part of the room and lets the high ceilings fade into soft shadows. An oversized chandelier or a large pendant light hung low over your main seating area can also help fill that vertical void and visually connect the ceiling to the furniture below.

    Use Warm-Toned Bulbs

    The color temperature of your lightbulbs makes a massive difference. Avoid cool white or “daylight” bulbs (often 5000K or higher), which can make a room feel like a hospital. Instead, choose “soft white” or “warm white” bulbs (around 2700K to 3000K). This will cast a golden, cozy glow that mimics the feeling of candlelight or a fireplace.

    Soften the Surfaces with Textures and Textiles

    If you want to know how to make a large room feel cozy, start by softening the space with approachable textures and textiles. Hard surfaces like drywall, glass, and bare floors reflect sound, which is why large rooms can have an unpleasant echo. To combat this, you need to introduce soft materials that absorb sound and add physical warmth.

    • Dress Your Windows: Naked windows contribute to a cold feeling. Install floor-to-ceiling curtains in heavy fabrics like velvet, thick linen, or lined cotton. Even when open, the fabric panels will absorb sound and soften the room’s hard edges.
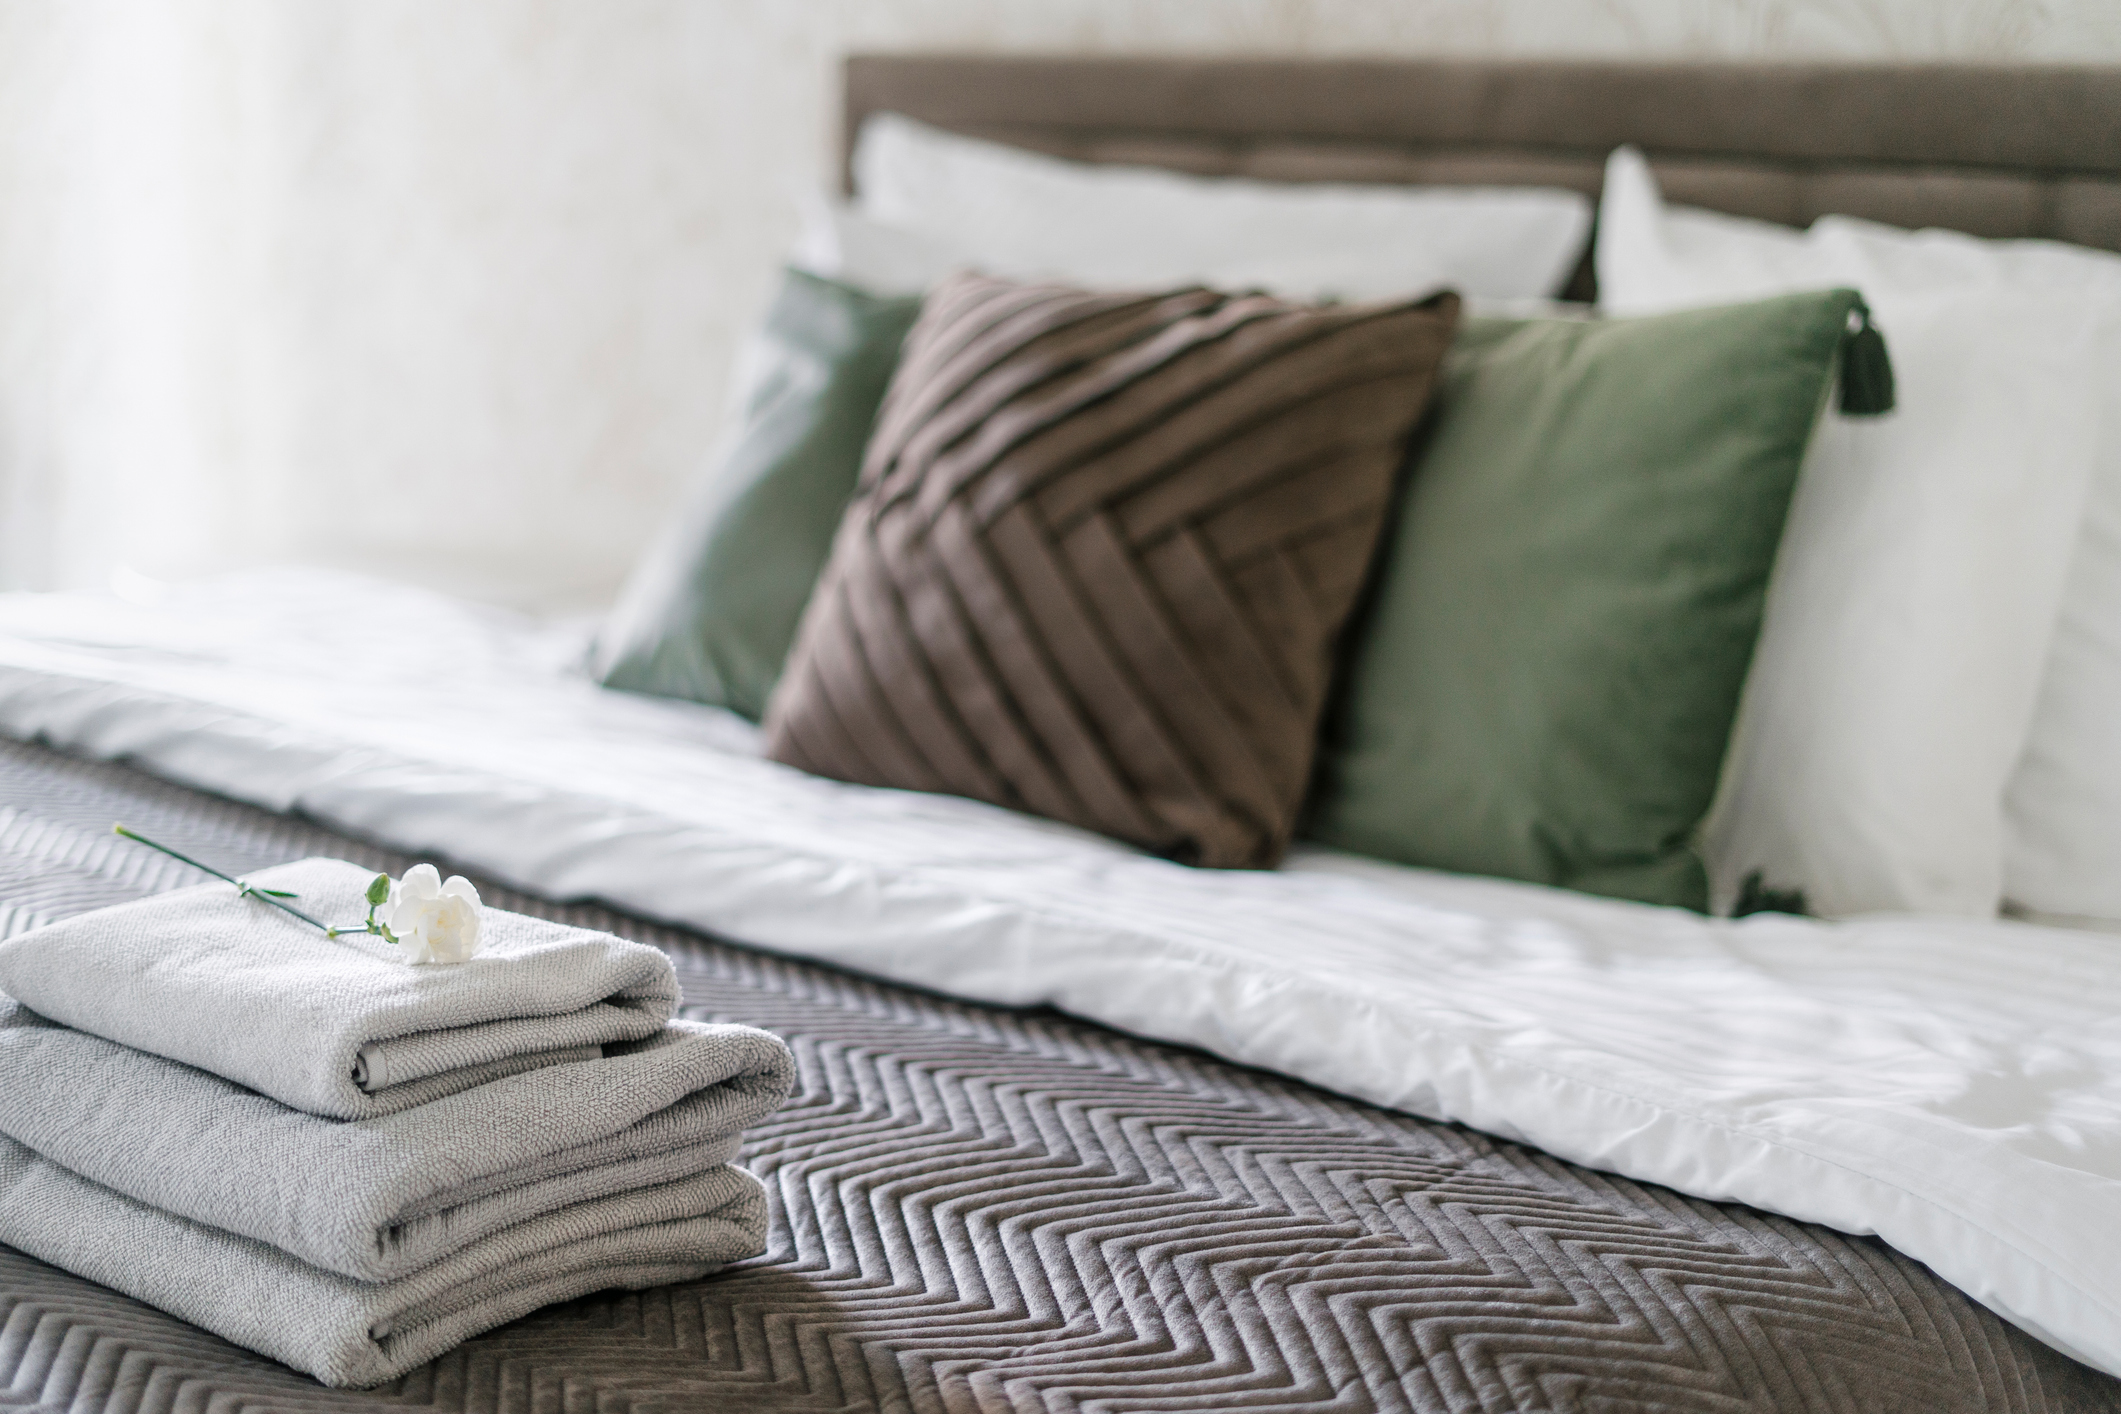
    • Pile on Pillows and Throws: Be generous with your textiles. Load up your sofas with throw pillows in a variety of fabrics—knits, faux fur, and velvet all work well. Drape chunky knit blankets over chairs and keep a basket of extra throws nearby. These items signal comfort to the brain.
    • Choose Upholstered Furniture: Opt for a fabric ottoman instead of a glass coffee table. Choose fabric lampshades over metal ones. The more soft surfaces you introduce, the quieter and cozier the room will become.
    • Bring in Plants: Plants are living texture. Large potted trees, like a Fiddle Leaf Fig or a tall palm, are perfect for filling empty corners and adding organic shapes that soften a boxy room. They bring a life and vibrancy that furniture alone cannot.

    Use Color to Your Advantage

    While white walls are classic, they can feel stark and endless in a massive room with lots of natural light. The right color strategy can make the space feel more enveloping.

    Embrace Darker Hues

    Don’t be afraid of moody colors. Darker paint colors are a surprisingly effective way to make a large room feel cozy and visually intimate. A deep navy, charcoal gray, or warm terracotta can make the walls feel like they are closer to you, creating an instant cocoon-like effect. If painting the whole room feels too bold, try a two-tone effect by painting just the bottom third of the wall a darker color to ground the space.

    Go Big with Art

    Just as a small rug gets lost, tiny picture frames will be swallowed by a large wall. You need art that matches the scale of the room. A massive canvas or a large-scale tapestry can instantly warm up a cold wall. Alternatively, create a gallery wall by grouping several smaller frames together to form a single, large visual unit.

    Simple Changes with Big Impacts

    Making a large space feel cozy is not about filling it with clutter; it’s about strategic layering and intentional choices. With just a few thoughtful changes, you’ll see how easy it is to make a large room feel cozy, warm, and welcoming. Start with one small change: pull your sofa away from the wall this weekend, or swap out your lightbulbs for a warmer tone. You’ll be surprised how quickly the atmosphere shifts from cold and cavernous to comfortable and inviting.

    Ready to find your dream home? Visit SAHomebuilder.com or call 1-855-SAHome1 to explore a wide range of new homes, including quick move-in options. We offer diverse new construction homes across Central and South-Central Pennsylvania. Whether you prefer one of our new home communities or want to build on your own land, we’ll help you find the perfect home to match your vision.

  • Earnest Money Deposit Explained: A Simple Guide for Homebuyers

    Earnest Money Deposit Explained: A Simple Guide for Homebuyers

    Earnest Money Deposit Explained: A Simple Guide for Homebuyers

    Buying a home is full of new steps and vocabulary. One term you’ll hear early on is “earnest money deposit.” It’s a key part of making an offer and shows the seller you’re serious. Think of it as a good-faith deposit that signals your commitment to purchasing their property. It’s a way to put your money where your mouth is.

    Let’s demystify the earnest money deposit. We’ll explain its purpose, how much you might need, how the process works, and most importantly, how your deposit is protected.

    Why is an Earnest Money Deposit Necessary?

    An earnest money deposit is funds you provide when your offer on a house is accepted. Its main job is to show the seller that you are a committed and credible buyer. When a seller accepts your offer, they take their home off the active market. They stop holding open houses and turn away other potential buyers.

    This puts the seller in a vulnerable position. If you were to back out of the deal for no valid reason, they would lose valuable time and marketing momentum. The earnest money deposit is a form of protection for the seller. It compensates them for that lost time if you break the terms of the contract. For you as the buyer, it makes your offer stronger and more appealing.

    How Much Earnest Money Do You Need?

    There’s no universal rule for the exact amount of an earnest money deposit. It often depends on the home’s purchase price, conditions in the local real estate market, and what is considered standard in your area. Generally, you can expect the deposit to be between 1% and 3% of the home’s sale price.

    For example, on a $400,000 house, an earnest money deposit would typically fall between $4,000 and $12,000.

    In a competitive market with multiple bidders, offering a larger earnest money deposit can help your offer stand out. It signals to the seller that you are financially secure and fully committed to closing the deal. Your real estate agent can advise you on an amount that makes sense for your situation.

    Earnest Money vs. Down Payment: What’s the Difference?

    This is a very common point of confusion. Earnest money deposit and your down payment are related, but they happen at different times.

    • Earnest Money: This is paid right when your offer is accepted (usually within 1-3 days). It is a smaller amount meant to secure the contract.
    • Down Payment: This is the large lump sum paid on closing day to the lender to secure your mortgage.

    The good news is that they work together. Your earnest money is essentially a prepayment of your down payment. If you plan to put $20,000 down on a house and you have already paid $5,000 in earnest money, you will only need to bring the remaining $15,000 to the closing table. You aren’t paying twice!

    Earnest Money Deposit Explained: A Simple Guide for Homebuyers

    How Earnest Money Works: A Step-by-Step Guide

    The process for handling earnest money is designed to be secure for both you and the seller. You don’t just hand over a check to the homeowner. A neutral third party manages the funds to ensure everything is done by the book.

    Step 1: Delivering the Deposit

    Once your purchase agreement is signed by both you and the seller, the clock starts ticking. The contract will specify a deadline, usually just a few days, to submit your earnest money. This is typically done via a cashier’s check, personal check, or wire transfer.

    Step 2: Holding the Funds in Escrow

    Your deposit is not given to the seller directly. Instead, it is placed in an escrow account. This account is managed by a neutral third party, like a title company, an escrow firm, or a real estate brokerage. This is a critical protection for you. The money is held securely and can only be released when specific conditions in the contract are met, such as at closing or if the contract is terminated.

    Step 3: Applying the Deposit at Closing

    When the sale proceeds to closing, the earnest money deposit is credited to you. It’s not an extra cost but rather part of the total funds you need for the purchase. The deposit amount is typically applied toward your down payment or closing costs, which reduces the final amount of money you need to bring to the closing table.

    Can You Get Your Earnest Money Back?

    Yes, your earnest money deposit is often refundable. Your protection comes from contingencies written into the purchase agreement. Contingencies are specific conditions that must be met for the transaction to move forward. If a contingency is not satisfied, you can legally cancel the contract and get your deposit back.

    Common contingencies that protect your earnest money deposit include:

    • Home Inspection Contingency: This gives you the right to have the home inspected. If the inspection reveals major problems and you can’t agree with the seller on a solution, you can back out with your deposit.
    • Appraisal Contingency: Lenders require an appraisal to confirm the home’s value. If the property appraises for less than the agreed-upon price, this contingency allows you to renegotiate or walk away.
    • Financing Contingency: If you make a genuine effort but are unable to secure a mortgage, this protects you. You can cancel the contract and have your earnest money returned.

    It’s vital to be aware of the deadlines for each contingency. If you fail to act within the specified timeframe, you may lose that protection.

    When Might You Lose Your Earnest Money Deposit?

    Although contingencies provide a safety net, you can forfeit your deposit if you breach the contract. This generally happens if you, the buyer, fail to meet your obligations.

    You could lose your earnest money if you:

    • Decide not to buy the home for a reason not covered by a contingency (e.g., you just change your mind).
    • Miss a critical contract deadline without getting a formal extension.
    • Get “cold feet” and back out of the deal without a contractual reason.

    Losing this deposit can be a painful financial loss. That’s why you should always review your purchase agreement thoroughly with your real estate agent before signing.

    A Key Step Toward Your New Home

    The earnest money deposit is a fundamental part of the home-buying process that shows you’re a serious contender. It strengthens your offer and gives the seller peace of mind. Though it requires a significant upfront payment, the system is built with safeguards like escrow and contingencies to protect your funds. With a clear understanding of how it works, you can move forward confidently on your path to owning a new home.

    Ready to find your dream home? Visit SAHomebuilder.com or call 1-855-SAHome1 to explore new construction homes across Central and South-Central Pennsylvania. We have a variety of communities, quick move-in homes, and opportunities to build on your land. It’s time to find your new home!

  • Luxury Living: Elevate Your Home on a Budget

    Luxury Living: Elevate Your Home on a Budget

    Luxury Living: Elevate Your Home on a Budget

    A home that feels luxurious isn’t about a high price tag; it’s about the feeling it creates. It’s a space that feels calm, comfortable, and uniquely you. Many people think luxury home decor on a budget isn’t possible, but thoughtful details can create a high-end feel without big costs.

    We’ll show you how to transform your living space using simple, affordable techniques. Let’s get started on making your home look and feel more expensive without breaking the bank.

    1. Start with a Clean Slate

    The most effective and completely free way to elevate your home is to declutter. Luxury spaces feel intentional and curated, with plenty of room to breathe. An organized, tidy environment immediately feels more spacious and sophisticated.

    The Art of Letting Go

    Start by going through each room and editing your belongings. Remove anything that doesn’t serve a purpose or bring you joy. Focus on clearing flat surfaces like countertops, coffee tables, and nightstands. This simple act creates “visual breathing room” and makes a space feel more deliberate and less chaotic.

    Smart and Stylish Storage

    Once you’ve pared down, ensure everything that remains has a designated spot. Use attractive storage solutions that hide clutter while adding to your decor. Think woven baskets for blankets, decorative boxes for remotes, and sleek furniture with hidden compartments. An organized home is a peaceful home, and that sense of tranquility is a hallmark of luxury.

    2. Layer in Richness with Texture

    One of the easiest ways to create luxury home decor on a budget is by layering rich textures. Texture adds depth and warmth, making a room feel more inviting and expensive. Layering different materials is a classic interior design trick. It’s a simple way to create a cozy and rich environment.

    Upgrade Your Soft Furnishings

    You don’t need to buy new furniture to make a big impact. Add a plush throw blanket over the arm of your sofa or a faux fur rug on the floor. In the bedroom, create a lavish look by layering your bedding. Combine crisp cotton sheets, a linen duvet cover, and a few decorative pillows in materials like velvet or silk.

    Rethink Your Window Treatments

    Flimsy, cheap-looking curtains can bring down the feel of an entire room. Swap them out for higher-quality drapes made of substantial fabrics like linen, velvet, or heavy cotton. To create the illusion of height, hang your curtain rod several inches above the window frame and extend it wider than the window. This makes the window appear larger and allows more natural light in.

    3. Focus on the Finer Details

    Small details often make the biggest difference. Upgrading basic, builder-grade hardware is a low-cost, high-impact project that can instantly elevate your space. It’s like changing the buttons on a coat; a small detail that enhances the entire piece.

    Elevate with New Hardware

    Take a look at the handles and knobs on your kitchen cabinets, bathroom vanities, and dressers. For a relatively small investment, you can replace them with something more stylish. Hardware in finishes like brushed brass, matte black, or crystal can add a custom, high-end look to even the most basic furniture.

    Let Your Lighting Shine

    Lighting fixtures are the jewelry of a room. An outdated ceiling light can date your space. Replace generic fixtures with something more eye-catching, like a modern pendant or a stylish chandelier. You can find affordable options at online retailers, flea markets, or even big-box stores. Even simply swapping a lampshade for a more textural one can refresh a room’s look.

    4. Harness the Power of Paint

    Color is a powerful tool when creating luxury home decor on a budget. The right color can completely change the mood, making it feel more sophisticated and put-together.

    Choose a Sophisticated Palette

    Instead of a basic white or beige, consider a more complex neutral. Shades like greige (a blend of grey and beige), soft creams, or earthy tones have more depth. For a bolder, cozier atmosphere, try rich colors like navy, charcoal gray, or forest green.

    Create a Focal Point

    An accent wall behind your bed or sofa can serve as a powerful focal point without the commitment of painting the whole room. You can use a bold paint color or experiment with budget-friendly peel-and-stick wallpaper in a chic pattern to add personality.

    Luxury Living: Elevate Your Home on a Budget

    5. Bring Nature Indoors

    Plants and fresh flowers infuse life, color, and a sense of calm into a home. They are a staple in luxury design for good reason.

    Go Big with Greenery

    Instead of several small plants, consider investing in one or two large floor plants, like a Fiddle Leaf Fig or a Monstera. A large plant makes a dramatic statement and can fill an empty corner with life. Be sure to place it in an attractive pot that complements your decor.

    The Elegance of Fresh Flowers

    A simple bouquet of fresh flowers on a dining table or nightstand adds an instant touch of class. You don’t need an elaborate arrangement. A handful of tulips or hydrangeas from the grocery store can brighten a room and make it feel special.

    Create Your Dream Home Today

    Achieving a luxurious home is less about spending a lot of money and more about making thoughtful, intentional choices. With these simple ideas, achieving luxury home decor on a budget is completely doable.

    Start with one or two of these budget-friendly ideas and see what a difference they make. Go ahead and start building the stylish sanctuary you deserve.

    Find your perfect home with S&A Homes. Explore our wide variety of new construction homes across Central and South-Central Pennsylvania, including quick move-in options and build-on-your-land opportunities. Visit SAHomebuilder.com or call 1-855-SAHome1 today to discover your ideal home.

  • Deed vs Title: What’s the Difference?

    Deed vs Title: What’s the Difference?

    Deed vs Title: What’s the Difference?

    When you buy a home, you’ll hear the words “deed” and “title” used a lot, often together. They sound similar, but they play very different roles in your homeownership journey. Understanding the difference between a deed vs a title helps make the homebuying process clearer.

    Let’s start with a simple analogy. Think of a concert. The title is your right to enter the venue and enjoy the show. The deed is the ticket that proves you have that right and allows you to pass through the gate. In real estate, the deed is the paper that transfers ownership, and the title is the concept of your legal rights to the property.

    We’ll walk you through everything you need to know, from closing day procedures to the documents you’ll need to keep safe.

    What is a Deed vs. Title?

    Understanding these two terms is the first step to becoming a confident homeowner. They work as a team, but they are not interchangeable.

    What is a Deed? The Document That Transfers Ownership

    A deed is a written, physical, legal document that officially transfers property ownership from one person (the seller, or “grantor”) to another (the buyer, or “grantee”). It’s the key that unlocks ownership. For the transfer to be valid, the deed is signed by the seller, handed over to the buyer, and accepted. It must be in writing and contain a legal description of the property, the names of the parties involved, and language showing the intent to transfer ownership.

    What is a Title? Your Bundle of Ownership Rights

    Unlike a deed, a title is not a physical document. It’s a legal concept that represents your ownership of the property. When you “hold title” to a home, it means you possess a “bundle of rights” that come with it.

    This bundle includes the right to:

    • Possession: The right to live in and occupy the property.
    • Control: The right to use the property as you wish, within the law.
    • Exclusion: The right to decide who can and cannot enter your property.
    • Enjoyment: The right to use the property without interference from others.
    • Disposition: The right to sell, rent, or transfer ownership to someone else.

    Your ownership is proven through public records, starting with the deed.

    Why Does the Distinction Matter?

    Understanding the difference is crucial. The deed vs title distinction affects ownership rights and transfer validity.

    • Title is about your right to the property. It answers the question, “Who is the rightful owner?”
    • Deed is the instrument of transfer. It answers the question, “How did ownership move from the seller to the buyer?”

    You can’t have a valid transfer of ownership without a properly executed deed. And without a clear title, your ownership could be challenged.

    How They Work Together on Closing Day

    This is where the deed vs title relationship becomes official.

    1. Delivery and Acceptance: The seller signs the deed, officially becoming the grantor. They then “deliver” the signed deed to you, the grantee. When you accept it, the title—the legal right to own the home—is now yours.
    2. Recording: After the closing meeting, the title company takes your signed deed to the local county recorder’s office. This step, called recording, makes your ownership part of the official public record. It puts the world on notice that you are the new, rightful owner.

    Securing Your Ownership: Title Search & Insurance

    Before you can confidently take ownership, you need to know the title is “clear,” meaning the seller truly has the right to sell the property and there are no hidden claims against it.

    A title search is a deep dive into public records performed by a title company. They look for potential issues, sometimes called “clouds” or “defects,” such as:

    • Unpaid property taxes or contractor liens.
    • Outstanding mortgages.
    • Ownership claims from heirs or ex-spouses of previous owners.
    • Clerical errors in public records.

    If any issues are found, they must be resolved before the sale can move forward. To protect you from any issues missed during the search, you will purchase title insurance. This one-time fee protects you from financial loss due to title defects that might surface in the future. It’s a crucial safety net for your investment.

    Deed vs Title

    A Quick Guide to Common Deed Types

    Deeds come in a few different forms, each offering a different level of protection for the buyer. The type of deed you receive is important.

    • General Warranty Deed: This is the best you can get. The seller guarantees the title is clear and promises to defend you against any ownership claims, no matter when they originated. This offers the most protection and is the standard for most home sales.
    • Special Warranty Deed: With this deed, the seller only guarantees the title for the time they owned the property. They aren’t responsible for issues that arose before their ownership. This is more common in commercial transactions.
    • Quitclaim Deed: This deed offers zero guarantees. It simply transfers whatever interest the seller has in the property, which could be full, partial, or none at all. It’s often used between family members to transfer property or to fix a clerical error in a title.

    Your Post-Closing Checklist

    You’ve closed on your new home, but the work isn’t quite over. Here is a quick checklist of what to do next.

    • Confirm the Deed is Recorded: A few weeks after closing, call the county recorder’s office to confirm your deed has been officially recorded.
    • Store Your Recorded Deed Safely: Once the original recorded deed is mailed to you, keep it in a secure, fireproof location like a safe deposit box or home safe.
    • Update Your Homeowners Insurance: Contact your provider to ensure your policy is active and reflects your new ownership.
    • Change Your Mailing Address: File a change of address with the post office and update your address with banks, employers, and subscriptions.

    Frequently Asked Questions (FAQ)

    Q: Can there be more than one owner on a title or deed?
    A: Yes. A property can have multiple owners. The deed will list all grantees, and the title will reflect the shared ownership rights, defining how the property is owned (e.g., joint tenants).

    Q: Where should I keep my original deed?
    A: You should store your original recorded deed in a safe place, like a safe deposit box. While the copy at the county recorder’s office is the official public record, having your original is important for your personal files.

    Q: What happens if the deed isn’t recorded?
    A: An unrecorded deed can create serious problems. While the transfer of ownership is still technically valid between the seller and buyer, it is not official to the public. This leaves your ownership vulnerable to claims from creditors or other parties. Recording is a critical step.

    Q: Is title insurance really necessary?
    A: Yes. Lenders almost always require it, and it’s a wise investment for you. It protects you against unforeseen and potentially very expensive title defects that a search might not uncover, such as fraud or forgery in previous documents.

    Your Takeaway: Deed Is the Action, Title Is the Result

    The easiest way to remember the difference is to think of the deed as the tool and the title as the outcome. The deed is the legal instrument that transfers ownership. The title is the abstract concept of your legal rights to the property that you receive as a result of that transfer.

    Together, a clear title and a properly recorded deed ensure your home is truly yours, giving you peace of mind in your new investment.

    Ready to buy a new home? Visit us at SAHomebuilder.com or call 1-855-SAHome1. Explore new home opportunities, including quick move-in homes and build on your land options. With diverse new construction homes across Central and South-Central Pennsylvania, you’re sure to find your dream home.

  • Essential Tools for New Homeowners

    Essential Tools for New Homeowners

    The Ultimate Toolkit for New Homeowners

    Moving into a new home is an exciting chapter. As you begin to settle in, you will quickly find that homeownership brings a variety of small tasks, from hanging art to tightening loose fixtures. Having the right tools on hand from day one makes all the difference, saving you time, stress, and the cost of hiring a professional for simple jobs.

    We’ll outline the essential tools every new homeowner should assemble to tackle common projects with confidence. With a smart, focused approach, you can assemble a highly capable starter toolkit for a budget of around $150 to $300.

    The Core Kit: Your 12 Essential Tools

    These twelve items form the foundation of a great home toolkit. They will cover the vast majority of simple projects and repairs you will encounter as a homeowner.

    1. Claw Hammer: Use it for driving nails to hang decor and for prying them out when you need to make adjustments.
    2. Multi-Bit Screwdriver: Perfect for assembling furniture, tightening cabinet hinges, and replacing light switch plates. A single handle with interchangeable bits saves space.
    3. Pliers Set: A versatile set for gripping, bending, and cutting. It should include slip-joint, needle-nose, and tongue-and-groove pliers for everything from electrical work to plumbing.
    4. Adjustable Wrench: This single tool can tighten various sizes of nuts and bolts, making it essential for assembling furniture and tightening leaky faucets.
    5. 25-foot Tape Measure: Crucial for measuring rooms for new furniture, finding the center of a wall, and cutting materials to the correct size.
    6. Utility Knife: From breaking down moving boxes to trimming carpet or scoring drywall, this sharp, retractable blade is a workhorse.
    7. Level: Whether a 24-inch model or a smaller torpedo level, this ensures your pictures, shelves, and TV mounts are perfectly straight.
    8. Cordless Drill/Driver & Bit Set: This power tool is a game-changer. It drills holes for anchors and drives screws much faster and with less effort than doing it by hand.
    9. Stud Finder: To securely hang heavy items like mirrors and TVs, you must anchor them to the wooden studs inside your walls. This device finds them for you.
    10. LED Flashlight or Headlamp: Indispensable for seeing into dark spaces like under a sink, in a crawl space, or during a power outage. A headlamp keeps your hands free.
    11. Extension Cords: Outlets are never exactly where you need them. A medium-duty, 25-foot cord is invaluable for using power tools away from a wall.
    12. Assorted Fasteners & Anchors: A kit with various nails, screws, and drywall anchors will save you countless last-minute trips to the hardware store for small mounting jobs.

    Safety Basics: Protect Yourself First

    Before starting any project, ensure you have basic safety gear. These small investments prevent common injuries and should not be overlooked.

    • Work Gloves: Protect your hands from splinters, cuts, and blisters.
    • Safety Glasses: Shield your eyes from dust, wood chips, and other flying debris when drilling or hammering.
    • First-Aid Kit: Be prepared for minor cuts and scrapes. Keep a well-stocked kit in an easily accessible place like the kitchen or laundry room.
    • Ear Protection: Essential for protecting your hearing when using loud power tools.

    Helpful Add-Ons for Your Toolkit

    Once you have the essentials covered, these items will expand your capabilities and make specific jobs even easier.

    • Allen Keys (Hex Wrenches): Non-negotiable if you plan to assemble any flat-pack furniture.
    • Handsaw: A small saw is useful for trimming tree branches or cutting wood for small DIY projects.
    • Picture-Hanging Kit: Contains all the specialized hooks, wires, and nails to hang frames safely with minimal wall damage.
    • Surge Protectors: Use these to protect your valuable electronics, like computers and TVs, from power surges.
    • Batteries: Stock up on common sizes like AA and AAA for smoke detectors, thermostats, and remotes.
    • Basic Toolbox: A simple 19-inch plastic toolbox will keep all your hand tools organized, protected, and easy to carry.

    Quick Buying Tips for Your Toolkit

    • Quality & Size: For hand tools, opt for comfortable, non-slip grips. A 16-ounce hammer is the perfect all-around weight. An 8-inch or 10-inch adjustable wrench offers great versatility.
    • Smart Features: Look for a screwdriver with magnetic tips to prevent dropped screws and a tape measure with a sturdy blade lock.
    • Drill Voltage: A 12V or 18V cordless drill provides an excellent balance of power and weight for the average homeowner.
    • Stud Finders: Electronic stud finders are more accurate than magnetic ones and often include bonus features like live wire detection.

    Toolkit Storage and Maintenance

    Your tools are an investment. A simple care routine will ensure they last for years and are always ready when you need them.

    • Organize: Keep tools in a dedicated toolbox or on a pegboard system. This keeps them easy to find and protected from damage.
    • Clean & Dry: After use, wipe down metal tools with a dry rag to remove dirt and moisture. This is the single best way to prevent rust. Store them in a dry environment.
    • Charge: Keep your cordless drill battery charged. Refer to the manufacturer’s instructions for proper long-term battery care.

    Building your homeowner toolkit is a marathon, not a sprint. Start with these essentials, and you’ll be well-prepared to tackle common tasks and truly make your new house a home.

    When you’re ready to find your dream home, visit us at SAHomebuilder.com or call 1-855-SAHome1. Explore a wide range of new home opportunities, including quick move-in homes, across Central and South-Central Pennsylvania. Whether you choose one of our communities or want to build on your own land, we’re here to help you find the perfect home.

  • Understanding Your Home’s Equity

    Understanding Your Home’s Equity

    Understanding Your Home’s Equity

    Your home is likely your biggest asset, but its value isn’t just about what it could sell for. A significant part of that value is your home’s equity, a powerful resource that grows over time that you can use to your advantage. Understanding what home equity is, how to build it, and how to use it responsibly can open up a world of financial opportunities.

    This guide cuts through the noise to give you the essential information you need. We’ll cover what home equity is, how to figure yours out, and how you can make it work for you.

    What Exactly Is Home Equity?

    In the simplest terms, home equity is the portion of your home that you truly own. It is the difference between your home’s current market value and the amount you still owe on your mortgage and other loans secured by the property. As you pay down your mortgage or as your home’s value rises, your equity increases.

    Think of it as your financial stake in your home. If you were to sell your property, your equity is the cash you would receive after paying off all associated debts.

    How to Calculate Your Home Equity

    Figuring out your equity is straightforward. You only need two key numbers.

    • The Formula: Current Home Value – Remaining Mortgage Balance = Home Equity
    • To find your equity percentage: (Your Home Equity / Current Home Value) x 100

    A Quick Calculation Example

    Let’s use an example to make it clear.

    • Your home’s current appraised value is $400,000.
    • You have an outstanding mortgage balance of $240,000.

    Equity in Dollars: $400,000 (Value) – $240,000 (Balance) = $160,000

    Equity as a Percentage: ($160,000 / $400,000) x 100 = 40% Equity

    Understanding Equity vs. LTV

    You will often hear lenders mention “loan-to-value” (LTV). Equity and LTV are two sides of the same coin:

    • Equity is the percentage of the home’s value you own.
    • LTV is the percentage of the home’s value you still owe.

    Using the example above, your LTV would be 60% ($240,000 / $400,000). Lenders use LTV to assess risk when considering you for a new loan.

    How Your Home Equity Grows

    Building equity is a gradual process. It increases through a combination of your actions and external market factors.

    1. Principal Paydown: Every mortgage payment you make has two components: interest and principal. The principal portion directly reduces your loan balance. As the amount you owe goes down, your equity goes up by the same measure.
    2. Market Appreciation: This occurs when your property’s value increases due to factors like a strong local housing market or rising demand in your neighborhood. Appreciation can be a powerful equity builder, but it’s not guaranteed, as market values can also fall.
    3. Home Improvements: Strategic renovations can increase your home’s market value, which in turn boosts your equity. Projects like a kitchen remodel, a bathroom addition, or enhanced curb appeal often provide a good return on investment.

    How You Can Use Your Home Equity

    Once you’ve built up a sufficient amount of equity, you can borrow against it. This is often called “tapping into” your equity. Lenders generally allow you to borrow up to 80-85% of your home’s value, minus your mortgage balance. Here are the most common ways to do it.

    Home Equity Loan

    A home equity loan is a second mortgage that allows you to borrow a lump sum of money against your equity.

    • Pros: You receive all the funds at once, which is ideal for large, one-time expenses like a major renovation or debt consolidation. The interest rate is typically fixed, making your monthly payments predictable.
    • Cons: You now have a second mortgage payment to manage. The interest rates may be higher than those for a primary mortgage.

    Home Equity Line of Credit (HELOC)

    A HELOC functions more like a credit card. You are approved for a certain credit limit and can draw funds as needed during a specific “draw period” (often 10 years).

    • Pros: It offers great flexibility. You only borrow what you need, when you need it, and only pay interest on the amount you’ve withdrawn.
    • Cons: Most HELOCs have variable interest rates, meaning your payments can change over time. The temptation to overspend can be a risk.

    Cash-Out Refinance

    With a cash-out refinance, you replace your current mortgage with a new, larger one. You then receive the difference between the new loan amount and what you owed on the old one in cash.

    • Pros: You end up with a single mortgage payment, which can be easier to manage. You might secure a lower interest rate on your entire mortgage if rates have dropped.
    • Cons: You are refinancing your entire mortgage, which resets the loan term. Closing costs can be significant, just like with your original mortgage.

    Reverse Mortgage

    A reverse mortgage is a special type of loan for homeowners aged 62 and older. It allows you to convert a portion of your home equity into cash payments without having to sell your home. You don’t make monthly payments; instead, the loan is repaid when you sell the home, move out, or pass away.

    • Pros: Provides a supplemental income stream during retirement. You can stay in your home.
    • Cons: The loan balance grows over time as interest and fees are added. It can reduce the inheritance left to your heirs. Strict age and eligibility requirements apply.

    Basic Eligibility Factors

    Lenders look at several factors before approving an equity-based loan:

    • Loan-to-Value (LTV) Ratio: This compares your loan amount to the home’s value. Most lenders require a combined LTV of 85% or less.
    • Credit Score: A higher credit score demonstrates your reliability as a borrower and helps you qualify for better interest rates.
    • Debt-to-Income (DTI) Ratio: Lenders want to see that you can comfortably handle an additional monthly payment.

    Pitfalls to Avoid When Using Home Equity

    Tapping into your equity is a serious financial decision. Be mindful of these risks.

    • Putting Your Home on the Line: Your home secures the loan. If you cannot repay it, you risk foreclosure.
    • Borrowing for Short-Term Wants: Using equity for lifestyle spending or depreciating assets like a car is risky. Focus on goals that improve your financial position.
    • Ignoring the Fees: These loans come with closing costs, appraisal fees, and origination fees. Make sure to factor these expenses into your decision.
    • Variable Rate Risk: With a HELOC, a rise in interest rates can cause your monthly payments to increase unexpectedly, straining your budget.

    5-Step Checklist Before You Borrow

    Run through this quick checklist to guide your thinking.

    1. Know Your Numbers: Calculate your current home equity. Do you have enough to meet lender requirements?

    2. Define Your Purpose: Why do you need the funds? Is it a true need or a want?

    3. Review Your Budget: Can your monthly cash flow support a new payment without strain?

    4. Compare Loan Products: Research whether a loan, HELOC, or refinance best fits your specific goal.

    5. Shop Around: Get quotes from multiple lenders (banks, credit unions) to find the best rates and terms.

    Frequently Asked Questions (FAQ)

    1. How long does it take to build enough equity to borrow?
    This varies depending on your down payment and market conditions, but it often takes 5-7 years of consistent payments to build the 20% equity cushion that lenders prefer.

    2. Does a home equity loan mean I’ll have two mortgage payments?
    Yes. A home equity loan is a separate loan, so you will have two payments. A HELOC also requires its own payment, while a cash-out refinance combines everything into one new mortgage payment.

    3. Can I sell my house if I have a home equity loan?
    Absolutely. When you sell, the proceeds are first used to pay off your primary mortgage, then the home equity loan or HELOC balance. The remainder is your profit.

    Put Your Greatest Asset to Work

    Your home is a dynamic financial tool that builds wealth over time. By understanding how your equity works, you can make informed decisions that align with your long-term goals. Whether you’re a new buyer focused on that first payment or a long-time owner ready to leverage your investment, careful planning is the key. Take the time to evaluate your options, and you can confidently put your most valuable asset to work for you.

    Ready for a new home? Visit SAHomebuilder.com or call 1-855-SAHome1. Discover new home opportunities, including quick move-in homes. We offer diverse new construction homes across Central and South-Central Pennsylvania. Whether you choose a community or build on your land, you’ll find your dream home.

  • Beat the Rush: Your Ultimate Holiday Home Organization Guide

    Beat the Rush: Your Ultimate Holiday Home Organization Guide

    Beat the Rush: Your Ultimate Holiday Home Organization Guide

    The holiday season should be about warmth, celebration, and creating memories with loved ones. However, the lead-up can often feel chaotic, with a long to-do list that makes it hard to feel festive. Reduce that pre-holiday stress with our ultimate holiday home organization tips before the season truly kicks off.

    A well-organized home not only looks better but also functions more smoothly, especially with a busy schedule or guests. Our holiday home organization guide provides a simple approach to help you declutter, prepare, and set the stage for a peaceful and enjoyable holiday. We’ll walk through decluttering key areas, preparing for visitors, and streamlining your decoration process.

    Start with a Smart Decluttering Plan

    Before you can organize, you need to create a clean slate. A thorough declutter clears out the old, makes space for the new (like gifts and decor), and simplifies cleaning. Trying to tackle the entire house at once is a recipe for burnout, so focus on one area at a time.

    Conquer Clutter Zone by Zone

    Start with the high-traffic spaces that will be central to your holiday hosting. For each room, use a simple four-box method to make quick decisions: Keep, Donate, Trash, and Relocate.

    • Living Room: This is where family and friends will gather. Clear surfaces like coffee tables and bookshelves. Sort through magazines, old mail, and miscellaneous items that have piled up to make room for decorations and serving trays.
    • Kitchen: The heart of holiday cooking and mingling. Go through your pantry and fridge, tossing expired items and taking note of what you already have for holiday recipes. Clear countertops by storing appliances you don’t use daily to maximize your food prep area.
    • Entryway: This is the first space your guests will see. Tidy up the coat closet to make room for visitors’ jackets, organize shoes, and create a clear, welcoming entrance.
    Beat the Rush: Your Ultimate Holiday Home Organization Guide

    Prepare for Your Guests with Ease

    If you’re hosting overnight guests, making their space comfortable is a top priority. A well-prepared guest room and bathroom show you care and help your visitors feel at home. Getting this done ahead of time means you won’t be scrambling at the last minute.

    The Guest Room Retreat

    Your guest room might serve as a home office or storage area for most of the year. Now is the time to transform it back into a welcoming retreat for visitors.

    Start by clearing out any personal belongings that have accumulated in the space. Ensure the bed has fresh, clean linens, and provide an extra blanket and pillows. Clear out some space in the closet or a dresser so your guests can unpack and settle in. Small touches, like placing a bottle of water on the nightstand and writing down the Wi-Fi password, go a long way.

    The Guest Bathroom Essentials

    A clean and well-stocked bathroom is a must. Give it a thorough cleaning before guests arrive, and remove your personal toiletries from the counter and shower area to give them their own space.

    Put out fresh towels, a new bar of soap or full soap dispenser, and extra toilet paper in a visible spot. For an extra touch of hospitality, you can create a small basket of travel-sized essentials they might have forgotten, such as a toothbrush, toothpaste, shampoo, and lotion.

    Tame and Organize Your Holiday Décor

    Nothing dampens the decorating mood faster than untangling a massive knot of lights or searching endlessly for a special ornament. A little organization now will save you a major headache later.

    Take Stock and Edit Your Collection

    Before you start decorating, pull out all your holiday items. This is the perfect opportunity to assess what you have and what you still love.

    • Test Your Lights: Plug in every strand to make sure they work. It’s much better to discover a faulty strand now than when you’re halfway through decorating the tree.
    • Inspect Ornaments: Check for broken or damaged items. Repair what you can and let go of what you can’t.
    • Review Your Style: Tastes change. If you have decorations that you no longer love, consider donating them. This prevents you from decorating with faulty items and helps you identify if you need to purchase anything new.

    Implement Smart Storage Solutions

    How you store your decorations is key to keeping them in good condition and easy to find next year. The right storage will make the process a breeze.

    • Use Clear, Labeled Bins: Store items in clear, stackable containers so you can see the contents at a glance. Label each bin with its contents (e.g., “Living Room Ornaments,” “Outdoor Lights”).
    • Protect Fragile Items: Use ornament organizers with dividers for delicate glass balls. Wrap sentimental pieces individually in tissue paper or bubble wrap.
    • Invest in Specialty Storage: Light reels or spools prevent tangles, and wreath bags or boxes keep your wreaths from getting crushed. Store everything together in a designated area, such as a specific closet, attic, or garage shelf.
    Beat the Rush: Your Ultimate Holiday Home Organization Guide

    Embrace a Season of Calm and Joy

    By following these holiday home organization tips, you set the stage for a season filled with peace instead of panic. A decluttered, functional, and well-prepared home allows you to focus on what truly matters: spending quality time with your loved ones.

    Don’t wait until the last minute. Start early, take it one step at a time, and enjoy the process. A little preparation now will lead to a more relaxed and enjoyable holiday for you and your family.

    Ready to find your new home? Visit SAHomebuilder.com or call 1-855-SAHome1 to explore our latest opportunities, from quick move-in homes to build-on-your-land options. With a wide variety of new construction homes across Central and South-Central Pennsylvania, we’re confident you’ll discover the perfect place to call home.

  • Steps to Take After Closing on Your New Home

    Steps to Take After Closing on Your New Home

    Congratulations! After months of watching your new home transform from an empty lot into your dream space, the papers are signed, and the keys are officially yours. This is a major milestone worth celebrating! But after the initial excitement fades, you might start asking yourself, “What comes next?”

    The journey doesn’t end here. Taking a few important steps after closing on your new home that can help you feel settled and safeguard your investment. This guide is designed for new construction homeowners, with tips on everything from securing your property to navigating your builder’s warranty.

    The First 48 Hours: Immediate Priorities

    Before you start unpacking, focus on these critical tasks to secure your property and ensure it’s functional from day one.

    Secure Your Home: Rekey Your Locks

    Whether it’s a brand-new build or not, you can’t be sure who might have a copy of your keys, contractors, site supervisors, or others. For peace of mind, call a locksmith to rekey all exterior locks. It’s a simple, affordable step to ensure you’re the only one with access to your home.

    Identify Your Home’s Key Shut-Off Points

    Emergencies like a burst pipe or a tripped breaker can happen anywhere, even in new homes. Save yourself a frantic search by locating these main shut-offs now:

    • Water Main Valve: Usually found in the basement, a utility closet, or crawl space.
    • Circuit Breaker Panel: Locate the panel and familiarize yourself with the circuit layout. Your builder may have labeled them for convenience.
    • Gas Shut-Off Valve: If your home uses natural gas, the valve is typically near the meter outside.
      Snap a photo of each for easy reference. Knowing these locations can turn a potential crisis into a quick fix.

    Most builders will show you where these items are located during the final walk-through but it’s worth locating them again for peace of mind.

    Test Safety Devices

    Your new home likely comes equipped with smoke and carbon monoxide detectors, but don’t assume they’re ready to go. Press the test button on each unit to confirm they’re functioning properly. It’s a quick, simple check to ensure your safety systems are in top shape.

    The First Week: Getting Settled and Organized

    With the immediate security tasks handled, it’s time to manage the logistics of moving in and getting your life up and running.

    Confirm Your Utilities Are Active

    While you likely started this process before closing, now is the time to confirm all services are active and in your name. Double-check the status of:

    • Electricity
    • Water and Sewer
    • Natural Gas
    • Trash and Recycling

    Find out your collection schedule and order bins if they weren’t provided. This is also the time to schedule your internet and cable installation. Appointments can book up weeks in advance, so get on the schedule quickly to avoid a long wait without Wi-Fi.

    Update Your Address Everywhere

    The U.S. Postal Service (USPS) mail forwarding service is a great start, but it’s a temporary fix. You need to update your new address directly with important people and companies to avoid missed bills or lost packages.

    Your checklist should include:

    • Financial Services: Banks, credit card companies, loan providers.
    • Government Agencies: DMV, IRS, Social Security Administration.
    • Insurance Providers: Auto, health, life.
    • Your Employer: For payroll and tax documents.
    • Online Shopping & Subscriptions: Amazon, streaming services, etc.

    Start a Punch List

    Even the best builders can miss small details. During your first week, keep a “punch list” of any cosmetic issues: paint touch-ups, a sticky drawer, a baseboard scuff. Your builder’s warranty usually covers these, and it’s easier to address them all at once.

    The First Month: Mastering Your New Home

    You’re starting to settle in, and the boxes are disappearing. Now is the perfect time to establish routines that will protect your investment and simplify your life as a new construction homeowner.

    Create a “Home Central” Hub for Documents

    The paperwork you received from your builder and at closing is incredibly important. Create a dedicated binder or digital folder to store everything. This central hub should contain:

    • Your builder warranty documents and contact information
    • The final closing statement
    • Appliance manuals and individual product warranties
    • Your final inspection report
    • Records of any repairs or warranty work

    Having these documents organized and accessible will be a lifesaver for warranty claims, maintenance, or a future sale.

    Understand and Manage Your Builder Warranty

    Your new home comes with a warranty, which is one of the biggest perks of buying new. Take time this month to read through the warranty documents carefully. Understand what is covered and for how long. Typically, warranties are tiered:

    • 1-Year Warranty: Covers workmanship and materials, like drywall and paint. This is for your punch list items.
    • 2-Year Warranty: Covers systems like HVAC, plumbing, and electrical.
    • 10-Year Warranty: Covers major structural components of the home.

    Know the process for submitting a claim. Most builders have an online portal or a dedicated warranty representative. Document everything in writing and take photos of any issues you submit.

    S&A Homes’ Commitment to Customer Care

    At S&A Homes, “Customer Care” is more than a department; it’s our promise. We’re proud of our high customer satisfaction, with many homeowners recommending us to friends and family. From day one, we’re committed to “building it right the first time” and back this up with a proactive care program to address issues early.

    A key part of this commitment is our 10-Year Warranty, fully transferable, with no deductible, designed to protect your investment and peace of mind. Our dedicated team makes the warranty process simple and hassle-free. We’re here to ensure a durable, worry-free homeownership experience.

    Plan for Regular Maintenance

    A brand-new home still requires ongoing care. Proactive maintenance prevents small issues from becoming big problems and keeps your systems running efficiently. Create a seasonal checklist to stay on top of regular tasks. Your plan could include:

    • Monthly: Test smoke detectors and clean faucet aerators.
    • Seasonally: Change HVAC filters, clean out gutters (especially after construction debris), and test the sump pump.
    • Annually: Schedule an HVAC tune-up and inspect exterior caulking around windows and doors.

    Setting calendar reminders helps you stay on track with these important chores.

    Steps to take after closing on your new home
    Cheerful middle eastern family with eyeglasses of three having fun together at home. Mixed race parents talking with their little girl in living room. Cheerful family with specs embracing and playing with beautiful indian daughter girl in arms.

    Settle Into Your New Community

    Moving into a new construction community means many of your neighbors are new, too. This is a unique opportunity to build a neighborhood from the ground up.

    • Introduce Yourself: Don’t be shy! Take a walk and introduce yourself to the families on your street. Everyone is in the same boat.
    • Join Community Groups: Look for a neighborhood Facebook or social media group. This is often the fastest way to get local recommendations and stay informed about community events.
    • Attend HOA Meetings: If you have a Homeowners Association, attend the meetings to stay informed and have a voice in your community’s development.

    Welcome Home!

    You did it. By checking these essential tasks off your list, you’re not just moving into a house; you’re setting the stage for a happy, well-managed home. Now you can finally unpack, decorate, and begin the exciting journey of making this new space truly your own.

    At S&A Homes, we build new communities across Central and South-Central Pennsylvania. Explore our quick move-in homes or build on your land options by calling 1-855-SAHOME1 or visiting SAHomeBuilder.com.

  • Speed Clean Your Home in No Time

    Speed Clean Your Home in No Time

    Speed Clean Your Home in No Time

    When you only have a few minutes to spare but want your home to feel tidy and inviting, speed cleaning is the perfect solution. Whether you’re scrambling to prepare for unexpected guests or just need a quick refresh, you don’t have to clean every square foot. With the right approach, you can work smarter, not harder, and transform your space with minimal effort.

    Here’s your step-by-step guide to speed cleaning your home without the stress, even when time is not on your side.

    1. Start with High-Traffic Areas

    Focus on the rooms your guests or family are most likely to see and use. Concentrating on high-visibility spaces ensures your efforts deliver the biggest impact in the least amount of time.

    • Living Room: Start by clearing away visible clutter like toys, books, or shoes. Straighten throw pillows, fold blankets, and give surfaces like coffee tables or entertainment centers a quick dust.
    • Kitchen: A clean kitchen makes the whole house feel more organized. Tidy up countertops by moving mail, dishes, or small appliances out of sight. Wipe down the counters and the sink for a polished look.
    • Bathroom: The guest bathroom is a high priority when entertaining. Replace the hand towel, ensure there’s enough soap and toilet paper, and give the sink, mirror, and toilet a quick wipe-down.

    Use a timer and spend five to 10 minutes on each room. This keeps you focused and prevents you from getting bogged down.

    2. Conquer Clutter Quickly

    Clutter is the easiest way for a home to appear messy. Quickly tackling it can make any space feel instantly more organized.

    • Grab a Basket or Bin: Sweep through each room and gather out-of-place items, like toys, books, or gadgets, into a basket. Store it somewhere out of sight, like a closet or pantry, and sort it out later.
    • Close Doors: Keep things simple by focusing only on common areas. Shut the doors to bedrooms, home offices, or other less-tidy rooms to limit what guests see.
    Speed Clean Your Home in No Time

    3. Polish Visible Surfaces

    Clean surfaces instantly make a space feel fresh and tidy. Instead of scrubbing every nook and cranny, focus on the areas that are most noticeable.

    • Counters and Tables: Wipe down high-use spaces like kitchen counters, coffee tables, and dining tables. This removes dust, crumbs, or smudges quickly.
    • Glass and Mirrors: Smudged mirrors, glass coffee tables, or sliding doors are noticeable, so give them a quick polish with glass cleaner or a microfiber cloth for an instant shine.
    • Floors: Areas with visible dirt or pet hair, such as the kitchen and hallways, benefit from a light sweep or quick vacuum. Focus only on high-traffic spots; there’s no need to deep clean every corner.

    Keep a multi-surface cleaner and a microfiber cloth on hand. These two tools work wonders on multiple surfaces, saving you time.

    4. Create a Welcoming Atmosphere

    A tidy space isn’t just about cleanliness; it’s about creating a warm and inviting vibe that makes everyone feel at home. Once your home looks neat, focus on small touches that make it feel cozy and complete.

    • Lighting: Bright, harsh lights can feel unwelcoming. Opt for warm lamp lighting or string lights to create a softer ambiance.
    • Add Fragrance: Light a candle, use a reed diffuser, or spritz an air freshener to give your home a pleasant scent. Fresh citrus, lavender, or vanilla are excellent choices.
    • Background Music: Low-volume instrumental or soft jazz music adds a relaxing backdrop and enhances the overall mood of your space.

    If you have extra time, place fresh or faux flowers on your coffee table or dining table. It’s a simple yet effective way to elevate your space.

    5. Keep Expectations Realistic

    Speed cleaning is about making your home feel presentable, not perfect. Most people won’t notice minor imperfections, so focus on the broader picture. After all, your guests are there to spend time with you, not evaluate your cleaning skills.

    Take a deep breath, appreciate what you’ve accomplished, and enjoy your refreshed home. Remember, even a little tidying up can make a big difference.

    Speed Cleaning Is All About Priorities

    By focusing on what matters most, you can make your home look clean, cozy, and inviting in no time. The key is prioritizing high-impact areas, tackling clutter strategically, and enhancing the atmosphere with just a few thoughtful finishing touches.

    Your home doesn’t have to be perfect to feel lovely. It just needs a little effort to shine.

    S&A Homes offers beautifully designed new home communities across Central and South-Central Pennsylvania. Explore exciting opportunities, from quick move-in homes to building on your own land. Call us today at (855) SAHOME1 or visit SAHomeBuilder.com to learn more and find your perfect home.

  • Homebuying Myths to Stop Believing

    Homebuying Myths to Stop Believing

    Homebuying Myths to Stop Believing

    Buying your first home is an exciting milestone, but it often feels surrounded by misconceptions that discourage many from starting the process. Concerns about needing a massive down payment, believing renting is always cheaper, or assuming perfect credit is necessary can hold you back unnecessarily. Before you delay your dream of homeownership any longer, let’s debunk these myths and explore the reality of modern homebuying.

    Homebuying Myth #1: You Must Have a 20% Down Payment

    One of the most persistent myths about buying a home is the belief that you need at least 20% of the purchase price saved before you can qualify for a loan. While putting down 20% when buying a home has its benefits, like avoiding private mortgage insurance (PMI) and lowering monthly payments, it is far from a requirement.

    The reality is that many first-time buyers purchase homes with far smaller down payments thanks to a range of loan options designed with affordability in mind.

    Accessible Down Payment Options

    • FHA Loans: Backed by the Federal Housing Administration, FHA loans allow you to buy a home with as little as 3.5% down, provided you meet the credit and income requirements.
    • VA Loans: For active-duty service members, and eligible veterans or surviving spouses, VA loans offer no down payment and do not require PMI.
    • USDA Loans: If you’re looking to buy property in a rural or suburban area, USDA loans require no down payment, making them a great option for qualifying buyers.
    • Low-Down-Payment Conventional Loans: Programs like Fannie Mae’s HomeReady or Freddie Mac’s Home Possible allow you to purchase with as little as 3% down, opening doors for those without large savings.

    By understanding these alternatives, it’s clear that a lack of a 20% down payment doesn’t have to be a roadblock. Pair these options with state or local down payment assistance programs, and you’re even closer to reaching your homeownership goals.

    Tips to Save for a Down Payment

    • Set a savings goal based on the type of loan you plan to use.
    • Automate transfers to a dedicated savings account.
    • Reduce discretionary spending; small sacrifices add up over time.
    • Explore grants and programs tailored to reduce upfront buying costs.

    Homebuying Myth #2: Renting Is Always Cheaper Than Buying

    It’s easy to see why people assume renting is the affordable alternative to buying; a monthly rental payment may look less intimidating than a mortgage. However, while renting can seem like the cheaper short-term option, it is often not the most cost-effective choice in the long term.

    Why Buying Can Be More Affordable Long Term

    Equity Building: When you rent, your monthly payments contribute to your landlord’s wealth, not your own. Homeownership, on the other hand, builds equity over time. This equity acts as a financial asset, growing as you pay off your mortgage and property values increase.

    Tax Benefits: Homeownership offers significant tax advantages, including the ability to deduct mortgage interest and property taxes, which renters cannot claim. These savings can lower your overall housing costs.

    Predictability: With a fixed-rate mortgage, your monthly housing costs stay consistent. Meanwhile, renters face yearly increases as landlords adjust to market demands.

    Wealth Creation: Real estate often appreciates over time, allowing homeowners to build wealth simply by owning property. Renters miss out on this opportunity entirely.

    Should You Rent or Buy?

    To decide, consider factors like your financial readiness, career stability, and how long you plan to stay in one place. Use a rent-versus-buy calculator to analyze your specific circumstances, factoring in taxes, maintenance, and potential price appreciation.

    Homebuying Myths to Stop Believing

    Homebuying Myth #3: You Need Perfect Credit to Buy a Home

    A common concern among first-time buyers is that an imperfect credit score will prevent them from qualifying for a mortgage. While your credit score does play an important role in securing a loan, lenders don’t require perfection.

    Loan Options for Buyers with Less-Than-Perfect Credit

    • FHA Loans: These require a minimum score of just 580 to qualify for a 3.5% down payment. Scores as low as 500 might also qualify with a larger down payment.
    • VA Loans: While they don’t have a set minimum, most lenders look for scores of 620 or higher.
    • USDA Loans: Buyers in rural areas with scores around 640 or higher can potentially qualify for no-down-payment mortgages.
    • Conventional Loans: Some programs accept scores as low as 620, and lenders analyze your complete financial profile, not just your credit score.

    This wide range of options means that even buyers with credit challenges have a path to homeownership.

    How to Improve Your Credit

    • Check Your Credit Report: Request free reports from Equifax, Experian, and TransUnion to review for errors.
    • Pay Bills on Time: Your payment history is the biggest factor in your credit score.
    • Limit New Credit Applications: Avoid opening new accounts or applying for too many loans before buying a house.
    • Reduce Debt: Aim to lower your debt-to-income ratio by paying off balances over time.
    • Maintain Older Accounts: Keeping long-standing credit lines open can positively impact your score.

    Resources for First-Time Buyers

    Achieving homeownership is more attainable with the right tools and programs. Consider the following resources to make your path smoother:

    • HUD-Approved Housing Counselors: These experts provide free or low-cost guidance on budgeting, credit improvement, and the homebuying process.
    • Down Payment Assistance Programs: Many states and municipalities offer grants and low-interest loans to help cover upfront costs.
    • Free Online Calculators: Tools like rent-vs-buy calculators and mortgage affordability estimators can bring clarity to your decision-making process.
    • Educational Courses: Many first-time buyer programs include courses that teach the basics of mortgages, closing costs, and maintaining your home responsibly.

    The Empowering Reality

    Buying a home is a significant financial step, but it doesn’t have to be intimidating, especially if you’ve been held back by myths. Whether it’s overcoming the belief that you need huge upfront savings, breaking free from assumptions about renting costs, or working through credit challenges, the barriers may not be as large as they seem.

    The first step begins now; your future as a homeowner is closer than you think.

    S&A Homes offers a variety of new single-family homes in desirable communities across Central and South-Central Pennsylvania. Whether you’re looking for quick move-in homes or want to build on your own land, we have options to fit your needs. Learn more by calling (855) SAHOME1 or visiting SAHomeBuilder.com.